

Intro
This is the second and final part of a two-part series on building a solution that allows event attendees to cancel their registrations themselves. If you missed part one, you can CLICK HERE to read it first, then come back and continue. 😉
Step-by-Step Guide
In the first part, we set up the two flows that handle registration cancellations. In this part, we’ll focus on adding the trigger URL to the Event Registration Confirmation email and setting up a Registration Cancellation Confirmation email.
I’ll also share some considerations for you to think about. Doesn’t this sound great? Let’s dive in! 😊
1. Customizing the Event Confirmation Email
I’ve already covered setting up a dynamic Event Registration Confirmation email and sending it out in a previous post. So, if you haven’t done that yet, head over there first! #ShamelessSelfPromotion 😜
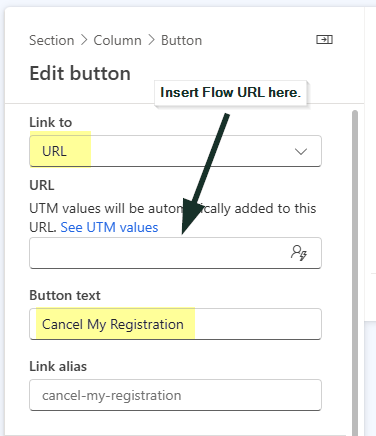
Here’s my email with the button for canceling event registration 😎.

Now we’re going to insert the URL for triggering the first flow in the Event Registration Confirmation email. We’ll also include and populate three parameters. To keep things mysterious (and not give away too much about their purpose), I’ve named the first two param1 and param2. 😉
Parameters:
| param1: | Event Registration GUID |
| param2: | Event GUID |
| key: | Security Token |
Once you’ve set up your email, add a button. In the sidebar menu for the button settings, set it to link to a URL. Change the button text to whatever you want it to say. I set mine to “Cancel My Registration.”
Next, go back to the first flow and copy the URL from the trigger.
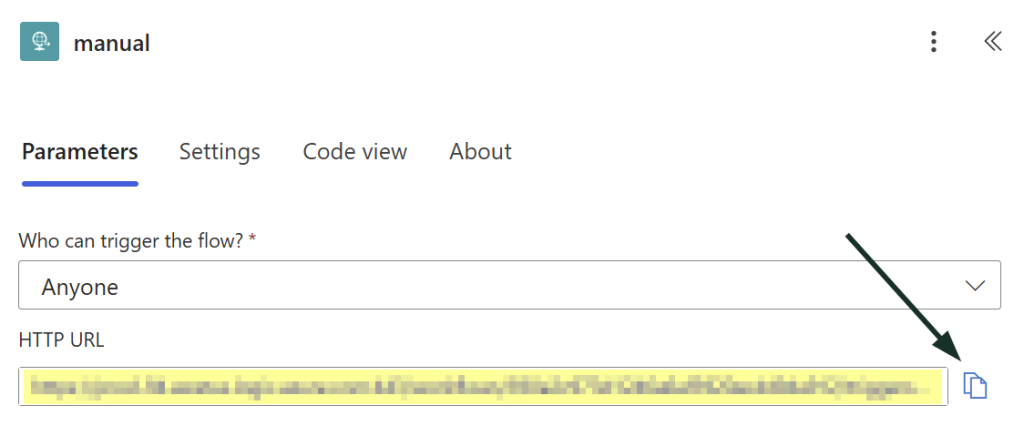
Paste it into the URL field of the button.
Note: While writing this post, I realized that you could create a text field on the brand profile, similar to what I did for the security token. This could simplify managing and referencing the URL as a dynamic value.
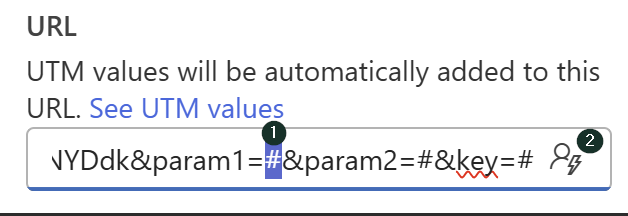
After the flow URL, paste this code:
| ¶m1=#¶m2=#&key=# |
We’re going to replace the # with dynamic text.
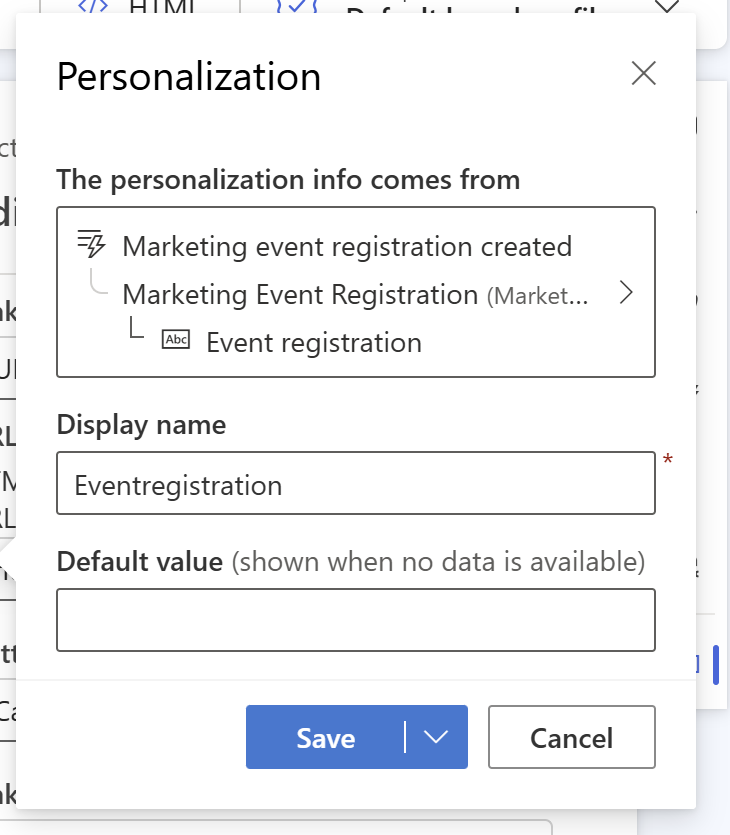
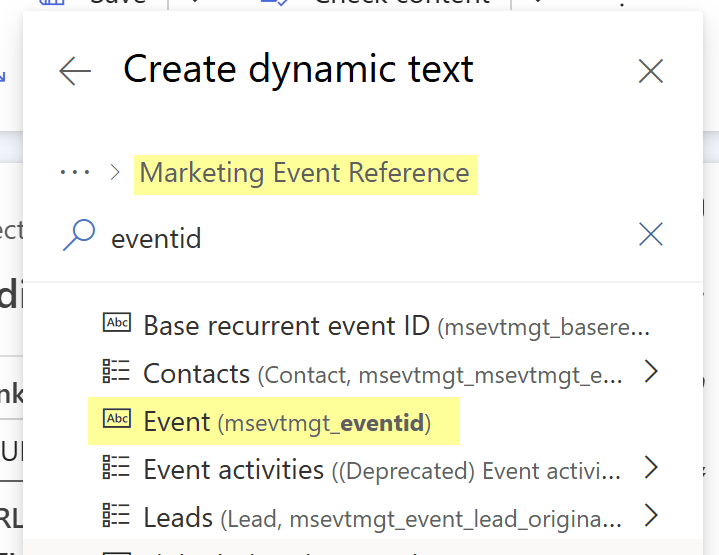
Place your cursor on the # for param1, highlight it, and click the Dynamic Content button to insert the Event Registration GUID.
Press Insert dynamic text and then Choose Value.
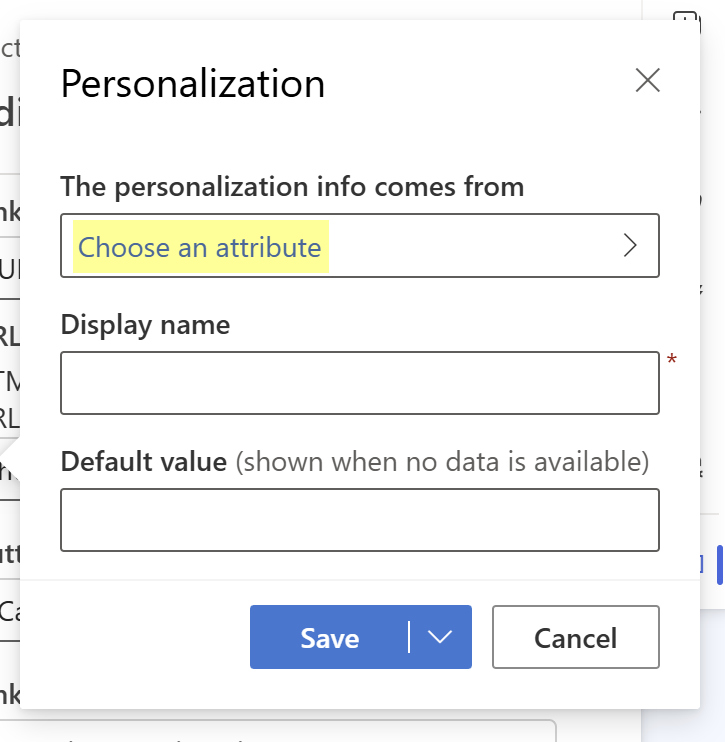
Next, select the content from the “Marketing event registrion created” trigger. Choose the Event Registration table.
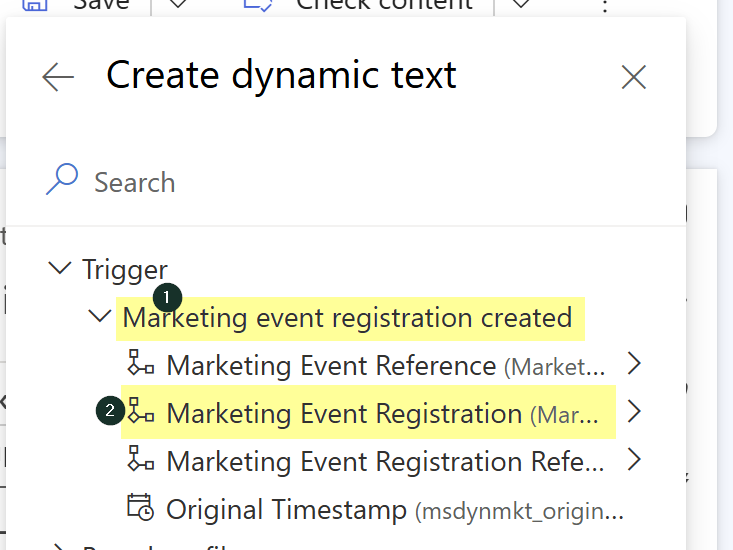
Search for its GUID (msevtmgt_eventregistrationid), and select it.
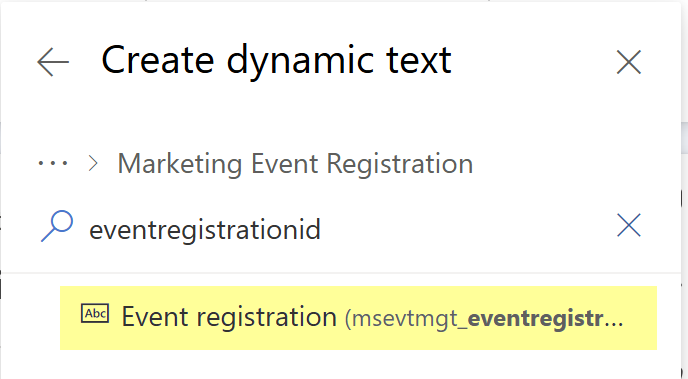
Press save to insert it.
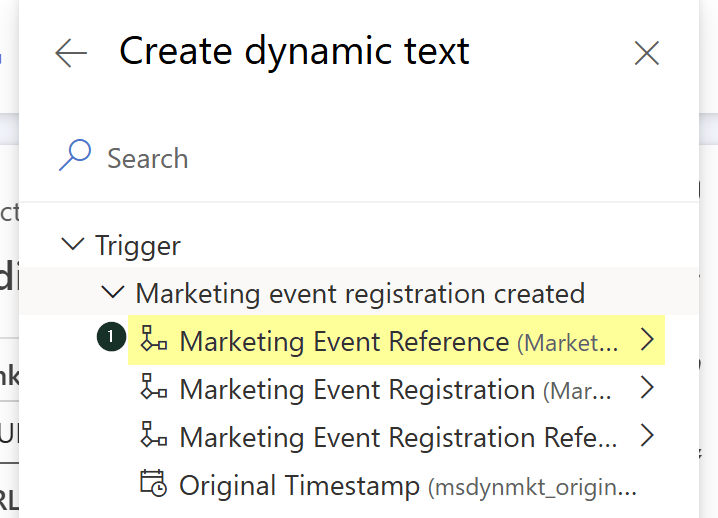
Now highlight the # for param2. Just like with param1, press Insert Content, but this time select the GUID for the Event. Choose the Event table and find the field msevtmgt_eventid.
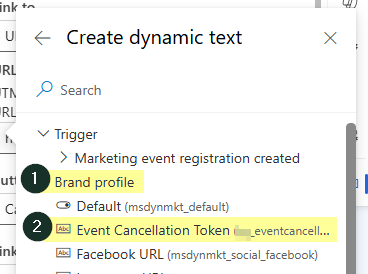
For the parameter key, we’ll retrieve it from the Brand Profile. Open the Dynamic Text selection menu, then choose Brand Profile, and find the Event Cancellation Token field.
You should now have a link that looks something like this:

That’s it. Save the email and include it in the appropriate journey. Your attendees can now cancel their registration all by themselves.
2. Designing the Cancellation Confirmation Email & Journey
Lastly, we’ll create a confirmation email for the cancellation. This ensures the attendee stays informed and has all the relevant information. We’ll include some dynamic content to make it personalized. I never get tired of creating dynamic components, it’s always so satisfying! 😊
I kept my email simple:

Start by creating a new email.
When setting it up, don’t forget to use a clear and consistent naming convention, it’s a small detail that makes managing emails so much easier down the line.
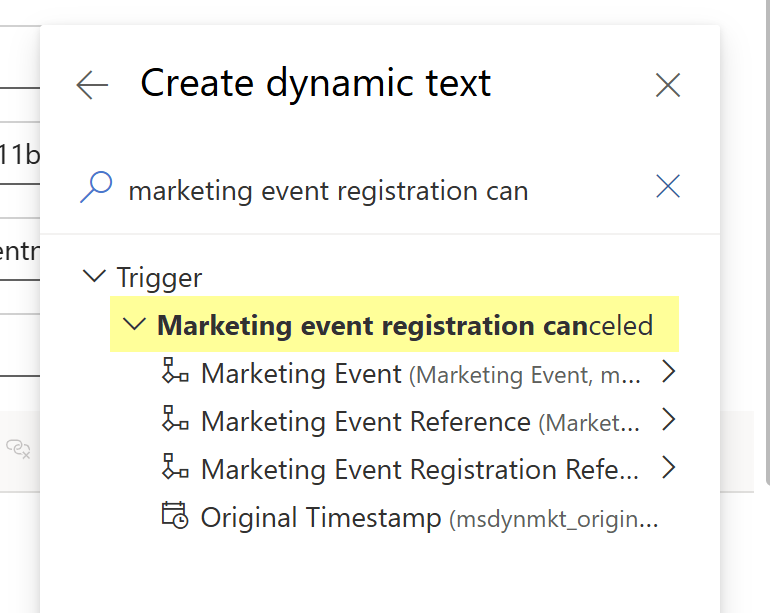
Next, add dynamic content to personalize the email. Use the trigger “Marketing event registration canceled” to pull in the relevant information dynamically.
Now you can pick and choose the dynamic content you want to include. The Event Registration table is connected to both the Event and the Contact, so you have access to all the information you might need. Go all out or keep it simple. The choice is yours.
Setting up the Journey
For setting up the journey, you can reference this post for guidance. Just remember to use the trigger “Marketing event registration canceled” instead.
Considerations
Security Concerns
In this solution, we are using a publicly accessible URL to trigger a Power Automate flow that interacts with Dataverse. Because of this, it’s important to ensure that only the right people can use it.
In my solution, I’ve added a security token (or something close to it). While this is a simple implementation, I recommend exploring more secure options. For example, the URLs used for Preference Center by Customer Insights Journeys include a token that is unique to each specific email sent. This token is tied to the customer and has an expiration date. In contrast, the token I use here is static and only expires when it is manually updated. For better security, you will need to change it periodically.
Additionally, I use the GUIDs for Event Registration and Event to validate that the request is legitimate.
For someone to guess all of this information would be extremely difficult, though not entirely impossible. Even if they received an email with their own information, they would still need to figure out someone else’s Event Registration GUID.
If someone were to cancel another attendee’s registration, the affected attendee would receive an email notification and hopefully notice and react to the situation.
The only data we are exposing publicly is what we specifically choose to share. It is critical to be mindful of which data you decide to include in the process.
If you want to enhance protection, consider using Azure API Management. With this tool, you can import your endpoint (the trigger URL) and configure policies to add an extra layer of security.
Azure API Management also allows you to analyze incoming requests, providing valuable insights into usage patterns and potential unauthorized access attempts.
Source Control
In this solution, we rely on quite a bit of code. If you decide to build your own version, I highly recommend saving the code somewhere outside of Power Automate. This is especially important if you plan to make changes in the future. Having a backup allows you to revert if something goes wrong and keeps a history of the good stuff.
Plus, it’ll make you feel like a hardcore developer. I recently started using GitHub for this myself. Where’s my award? 🏆
Conclusion 🎉
So, there you have it, a guide to building a solution that allows event attendees to cancel their registrations all by themselves. This solution can be extended and configured in countless ways, so let your creativity flow. Just remember to keep the considerations from this post in mind. It’s essential to build solutions that are secure, functional, and genuinely make a difference.
Now I’m off to take on my next “Roman Empire”, building a Tamagotchi in a Canvas app. Sounds fun, doesn’t it? But first, FIKA! ☕
Leave a Reply