

This is part 1 of a two-part series. Read Part 2 here.
Background
One thing that has been my “Roman Empire” 🌐 for a while now is giving event attendees the ability to cancel their event registration all by themselves in D365 Customer Insights Journeys. But as you know, there is currently no way for them to do that, which is a bummer. 😓 This means we need to handle it manually, which takes away valuable Fika time. And as a Swede, I don’t compromise on Fika time.
If you even think about saying, ‘Well, in the old portal…,’ I’ll take a deep breath, count to ten, and then lovingly remind you that some things are better left in the dumpster of history. That clunky mess is about to be six feet under, and trust me, I won’t be shedding any tears at the funeral. Evolution is ruthless, and I’m here for it. So here we are, with our precious Fika time under threat. ☕️ But luckily, I recently made a breakthrough.
A while ago, I saw Matthew Devaney’s post “Power Automate Flow to Host a Web Page/Web Application.” I already knew you could trigger Power Automate flows with an HTTP request using a URL. But what Matthew did was provide a way to make this user-friendly and create a UI for when someone wants to cancel their registration.
So I reworked Matthew’s solution to fit my needs, and it works beautifully. 🌟 Huge thanks to Matthew for the inspiration! And shoutout to ChatGPT for providing some much-needed coding help.
Solution
What we are going to do is create a button in the event registration confirmation email that the attendee can press to cancel their registration. When they press the button, they are taken to a webpage asking them to confirm their cancellation. Once they confirm, the registration is canceled, and they receive a confirmation email. All this is orchestrated with Power Automate. How cool is that? 🚀
Components to create:
- Part 1:
- Security Token
- Two Power Automate flows:
- First one to provide the cancellation confirmation page.
- Second one to actually cancel the registration.
- Part 2
- Event confirmation email with the flow-triggering URL containing dynamic content.
- Event registration cancellation confirmation email & Journey.
Step-by-Step Guide
1. Creating Security Token
Before we dive into building, there’s something important to address upfront: this solution comes with certain security considerations. The approach involves using a publicly accessible URL to trigger a Power Automate flow, which interacts with data in Dataverse. I’ve included a section in part 2 of this guide where I’ll go into more detail about these concerns.
To mitigate risks, we’ll incorporate a security token into our solution and implement additional precautions, which I’ll explain further along the way. However, it’s crucial that you evaluate the risks against the benefits to decide if this solution is the right fit for your needs.
The token we create here is a simple one. This is just to show you the possibilities. We will use it in the flow trigger condition so the flow won’t trigger if the request doesn’t have the correct token.
In my example, I created a new text column in the Brand Profile table and added it to the form. This makes it easy to insert in the request URL in the email.
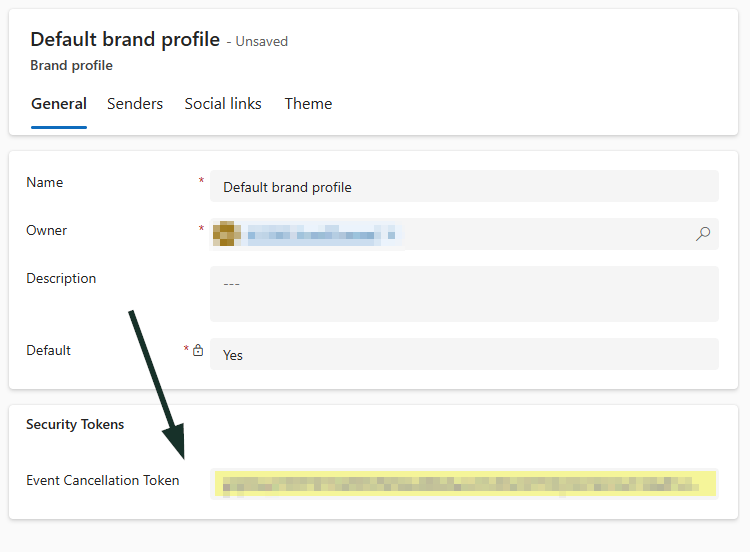
This is a normal text field, so anyone who has permission to edit it can. This token needs to be hard-coded in the trigger condition. If you change the token, you need to update the flow. Also, if you update the token, all previously sent links will stop working. So keep that in mind. It’s a good idea to set up a routine to change the token regularly.
Enhancements to Consider
Some improvements you could make here include adding column-based security to control who can edit the Token field. You could also create a function that automatically sets the token, making the process more streamlined.
Since dynamic input isn’t allowed in the trigger condition, you could instead handle validation after the flow is triggered. This approach ensures that only valid requests proceed while maintaining flexibility in your setup.
2. Event Registration Cancellation Confirmation Page Flow
We are now going to build Power Automate flows to handle the interaction with the attendee and the cancellation of the request. Because we want this to be a smooth experience, we can’t add too many steps to these flows. If we do, it will impact the user experience. People don’t like to wait for things, so only add the necessary actions. If there are other steps, add them to a separate flow that you trigger another way.
Another reason for keeping steps as minimal as possible is to limit the number of interactions publicly triggerable flows can perform in our system.
In the Event Registration confirmation email, we’ll include a button with a URL that triggers the first flow. This URL will also pass along some parameters to the flow, populated with dynamic content in the email.
Parameters:
| param1: | Event Registration GUID |
| param2: | Event GUID |
| key: | Security Token |
This is the flow we are building:
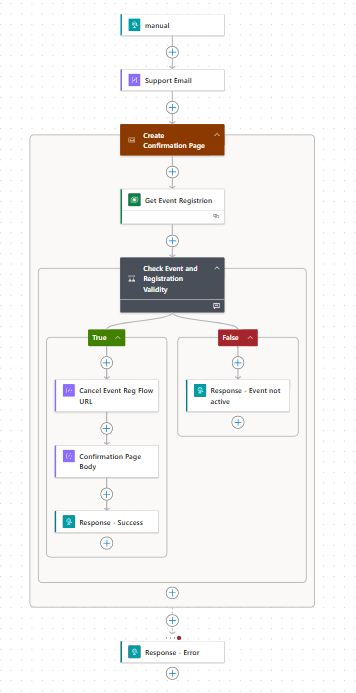
Steps to build the flow:
Create a new instant cloud flow and select the trigger “When an HTTP request is received.”

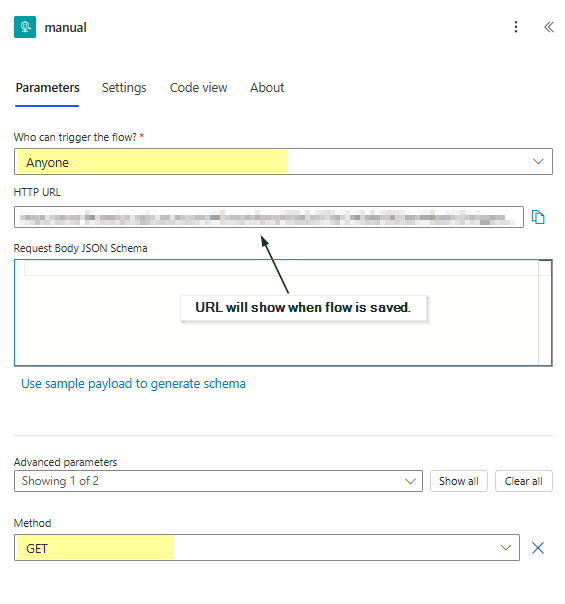
| Who can trigger the flow? | Anyone |
| HTTP URL: | This URL is generated when the flow is saved for the first time. It will be used in the event confirmation email. |
| Method: | GET |
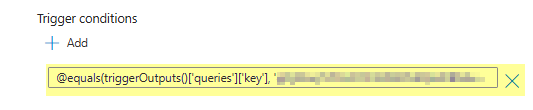
Under Settings, add a trigger condition:
This step ensures that only requests with the correct Security Token can trigger the flow, adding a layer of security to the solution.
plaintextCopyEdit@equals(triggerOutputs()['queries']['key'], 'YourSecurityToken') |
Replace YourSecurityToken with the token you’ve created.
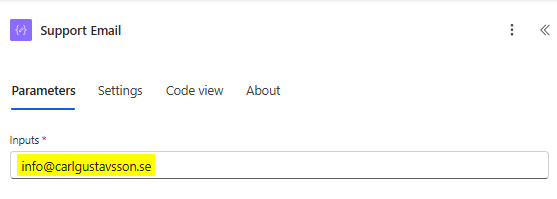
Compose Action – Support Email:
Add a Compose action named “Support Email.” Use this to insert a contact email hyperlink so attendees can easily reach out if needed. Alternatively, use an environment variable for flexibility.
Scope Action for Logic and Error Handling:
Add a Scope action and include all logic within it. This ensures that if something fails, the attendee will receive a meaningful error message.
Get Event Registration Data
Add a “Get a row by ID” action to validate the provided Event Registration GUID. If the GUID is invalid, the action will fail, and the attendee will receive an error message.
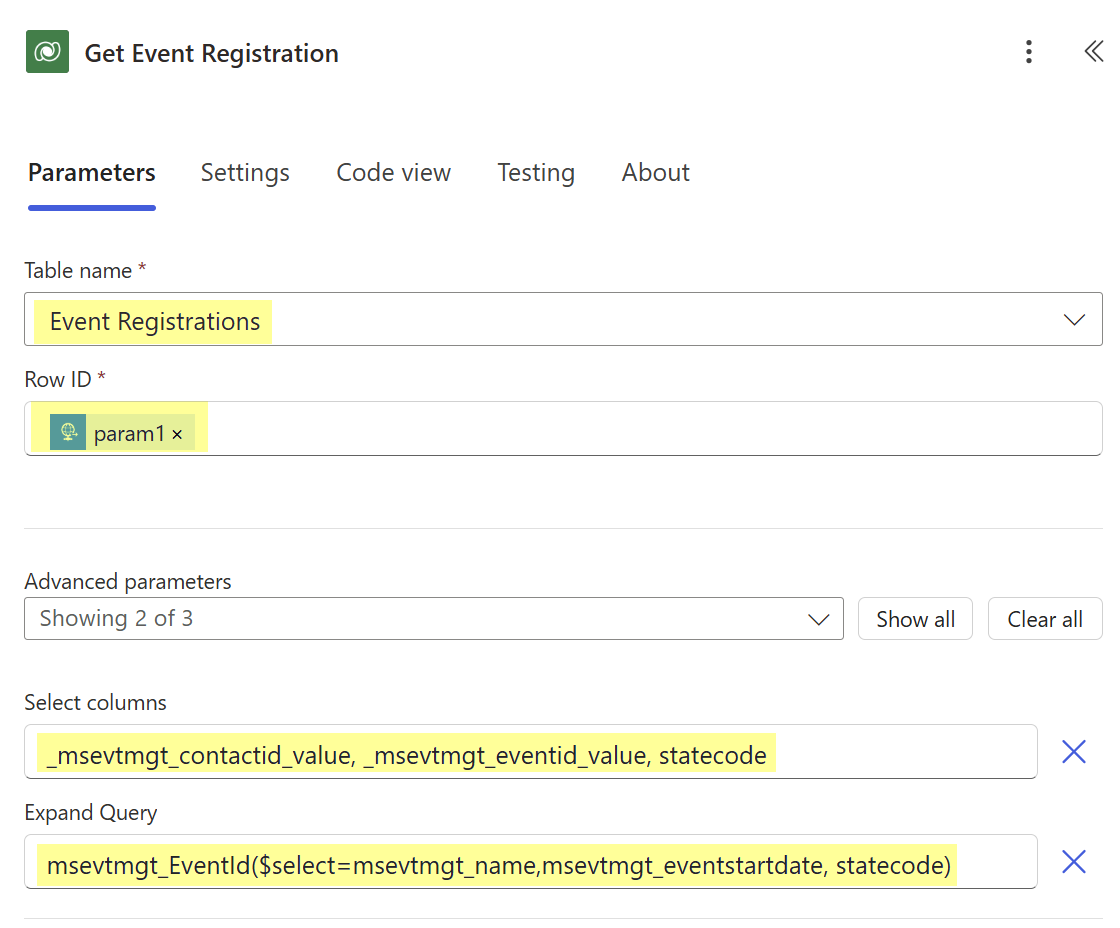
| Name: | Get Event Registration |
| Table name: | Event Registrations |
| Row ID: | @{triggerOutputs()?['queries']['param1']} |
| Select columns: | _msevtmgt_contactid_value, _msevtmgt_eventid_value, statecode |
| Expand Query: | msevtmgt_EventId($select=msevtmgt_name,msevtmgt_eventstartdate, statecode) |
Add a Condition Action
This is our next check. Here we will check that the Event Registration and Event are active and also that the ID of the event matches the one we received from the triggering request.
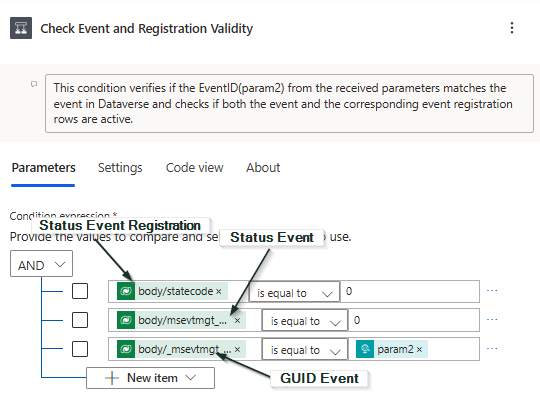
Condition
| @{outputs(‘Get_Event_Registration’)?[‘body/statecode’]} | is equal to | 0 |
| @{outputs(‘Get_Event_Registration’)?[‘body/msevtmgt_eventid/statecode’]} | is equal to | 0 |
| @{outputs(‘Get_Event_Registration’)?[‘body/_msevtmgt_eventid_value’]} | is equal to | @{triggerOutputs()?[‘queries’][‘param2’]} |
If you want, you can add more logic here for validation. For example, you might want to only allow self-cancellation until 24 hours before the event starts.
True Branch:
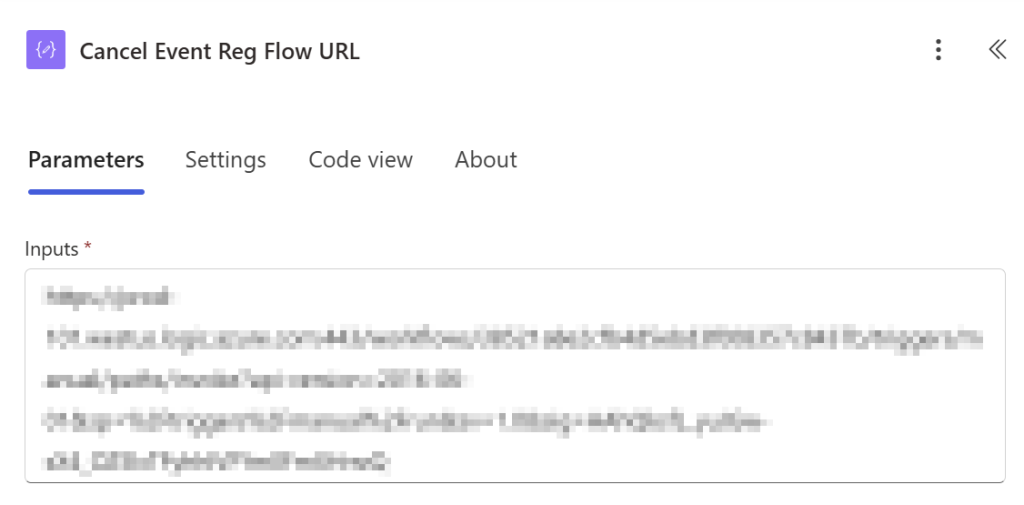
Add a Compose action and name it “Cancel Event Reg Flow URL.” This is where we will insert the triggering URL for the second flow. For now, type something as a placeholder so we can save the flow.
Add another Compose action and name it “Confirmation Page Body.”
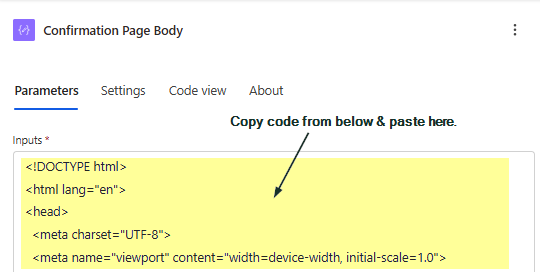
Copy and paste this code in the actions input field:
<!DOCTYPE html>
<html lang="en">
<head>
  <meta charset="UTF-8">
  <meta name="viewport" content="width=device-width, initial-scale=1.0">
  <title>Cancel Event Registration</title>
  <!-- Bootstrap CSS -->
  <link href="https://cdn.jsdelivr.net/npm/bootstrap@5.3.0/dist/css/bootstrap.min.css" rel="stylesheet">
</head>
<body>
  <div class="container mt-5">
    <!-- Alert Messages -->
    <div id="alert-container"></div>

    <!-- Form -->
    <div class="card">
      <div class="card-body">
        <h2 class="card-title text-center mb-4">Cancel Event Registration</h2>

        <!-- Event and Attendee Details -->
        <div class="mb-4 text-center">
          <p><strong>Attendee Name:</strong> @{outputs('Get_Event_Registration')?['body/_msevtmgt_contactid_value@OData.Community.Display.V1.FormattedValue']}</p>
          <p><strong>Event Name:</strong> @{outputs('Get_Event_Registration')?['body/_msevtmgt_eventid_value@OData.Community.Display.V1.FormattedValue']}</p>
          <p><strong>Event Date:</strong> @{formatDateTime(outputs('Get_Event_Registration')?['body/msevtmgt_eventid/msevtmgt_eventstartdate'], 'dd/MM/yyyy')} </p>
        </div>

        <p class="text-center">
          We're sorry to hear you won't be able to attend. If you're sure you'd like to cancel your registration, please confirm by submitting the form below.
        </p>
        <p class="text-center">
          If you have any questions or would like to re-register in the future, feel free to <a href="mailto:@{outputs('Support_Email')}">contact us</a>.
        </p>

        <form id="cancel-form">
          <!-- Hidden Input -->
          <input type="hidden" id="param1">

          <!-- Confirmation Note -->
          <p class="text-center text-muted">
            Please note: Once your cancellation is processed, it cannot be undone.
          </p>

          <!-- Submit Button -->
          <div class="text-center">
            <button type="submit" class="btn btn-success" id="submit-button">Confirm Cancellation</button>
          </div>
        </form>

        <!-- Spinner -->
        <div class="text-center mt-3" id="spinner" style="display: none;">
          <div class="spinner-border text-primary" role="status">
            <span class="visually-hidden">Processing...</span>
          </div>
          <p>Processing your request, please wait...</p>
        </div>
      </div>
    </div>
  </div>

  <script>
  // Function to extract query parameters from the URL
  function getQueryParam(param) {
    const urlParams = new URLSearchParams(window.location.search);
    return urlParams.get(param);
  }

  document.addEventListener('DOMContentLoaded', () => {
    const param1 = getQueryParam('param1');
    const param2 = getQueryParam('param2');
    const key = getQueryParam('key');

    if (param1 && param2 && key) {
      document.getElementById('param1').value = param1;
      // Optionally, store param2 and key in hidden inputs if needed
      document.getElementById('param1').dataset.param2 = param2;
      document.getElementById('param1').dataset.key = key;
    } else {
      const alertContainer = document.getElementById('alert-container');
      alertContainer.innerHTML = `
        <div class="alert alert-danger" role="alert">
          Missing parameters. Unable to proceed with the cancellation.
        </div>
      `;
      document.getElementById('submit-button').disabled = true;
    }
  });

  document.getElementById('cancel-form').addEventListener('submit', async function (e) {
    e.preventDefault();
    const alertContainer = document.getElementById('alert-container');
    alertContainer.innerHTML = '';
    const spinner = document.getElementById('spinner');
    spinner.style.display = 'block';
    const submitButton = document.getElementById('submit-button');
    submitButton.disabled = true;

    const param1 = document.getElementById('param1').value;
    const param2 = document.getElementById('param1').dataset.param2;
    const key = document.getElementById('param1').dataset.key;

    const body = JSON.stringify({ param1: param1, param2: param2, key: key });

    try {
      const flowUrl = '@{outputs('Cancel_Event_Reg_Flow_URL')}';
      const response = await fetch(flowUrl, {
        method: 'POST',
        headers: { 'Content-Type': 'application/json' },
        body: body
      });

      spinner.style.display = 'none';
      if (response.ok) {
        alertContainer.innerHTML = `
          <div class="alert alert-success" role="alert">
            Your registration has been canceled.
          </div>
        `;
        submitButton.style.display = 'none';
        document.getElementById('param1').setAttribute('disabled', 'true');
      } else {
        throw new Error('Failed to submit');
      }
    } catch (error) {
      spinner.style.display = 'none';
      alertContainer.innerHTML = `
        <div class="alert alert-danger" role="alert">
          Failed to submit the form. Please try again later or contact our support team for assistance.
        </div>
      `;
      submitButton.disabled = false;
    }
  });
</script>
</body>
</html>
This code includes the following:
Query Parameter Handling: Extracts parameters (param1, param2, key) from the URL to prepopulate a hidden input field. Displays an error if required parameters are missing.
Form Submission: Processes form submissions to confirm cancellation by sending the data to a specified API endpoint using an asynchronous POST request. Displays success or error messages based on the API response.
Dynamic User Feedback: Provides alerts for missing parameters or submission errors and shows a loading spinner during processing.
Note: This code includes Power Automate dynamic content tags. If you encounter errors running the flow, it might be because you’ve named actions differently than in this guide.
Dynamic data included:
- Attendee Name: Retrieves the attendee’s name.
- Event Name: Retrieves the event name.
- Event Date: Formats and displays the event start date.
- Support Email: Retrieves the support email address.
- Flow URL: URL for the cancellation flow endpoint.
The page looks like this:

Feel free to customize the content and styling to match your preferences and aesthetic.
Add a Response action. If you can’t find it, search for “Request” in the list.
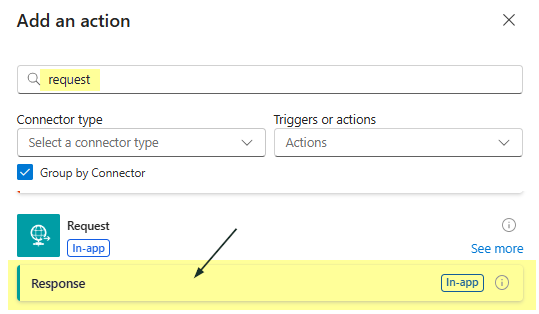
This action will send the page we created to the attendee.
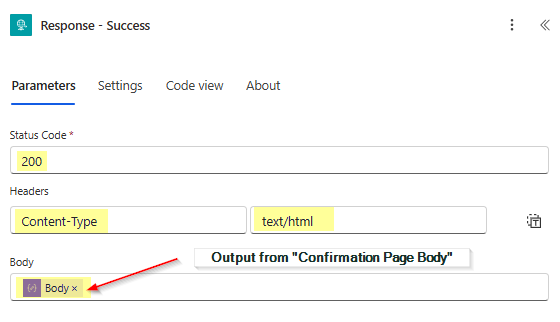
Set it up like this:
| Name: | Response – Success |
| Status Code: | 200 |
| Body: | @{outputs(‘Confirmation_Page_Body’)} |
Headers
| Key: | Value: |
Content-Type | text/html |
False Branch:
Add a Response action and name it “Response – Event Not Active”.
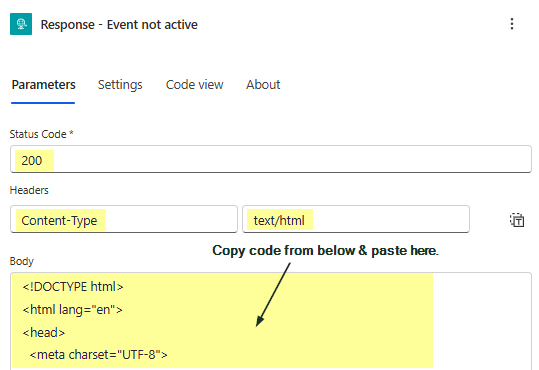
Set it up like this:
Name: | Response – Event Not Active |
| Status Code: | 200 |
| Body: | Copy code below and paste it here. |
<!DOCTYPE html>
<html lang="en">
<head>
  <meta charset="UTF-8">
  <meta name="viewport" content="width=device-width, initial-scale=1.0">
  <title>Event or Registration Not Active</title>
  <!-- Bootstrap CSS -->
  <link href="https://cdn.jsdelivr.net/npm/bootstrap@5.3.0/dist/css/bootstrap.min.css" rel="stylesheet">
</head>
<body>
  <div class="container vh-100 d-flex flex-column justify-content-center align-items-center">
    <div class="text-center">
      <h1 class="display-4 text-warning">Not Active</h1>
      <p class="lead">The event or the registration you are trying to access is no longer active. If you need further assistance, please <a href="mailto:@{outputs('Support_Email')}" class="text-primary">contact us</a>.</p>
    </div>
  </div>
</body>
</html>
Headers
| Key: | Value: |
Content-Type | text/html |
The page looks like this:

Feel free to customize the content and styling to match your needs 😉.
Error Handling:
After the Scope action, add a Response action. This will serve as a general “catch-all” error message displayed if anything fails in the Scope action.
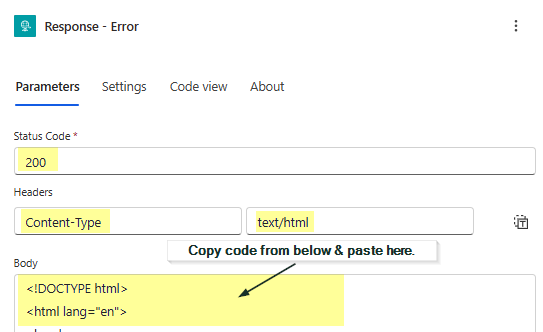
Set it up like this:
| Name: | Response – Error |
| Status Code: | 200 |
| Body: | Copy code below and paste it here. |
<!DOCTYPE html>
<html lang="en">
<head>
  <meta charset="UTF-8">
  <meta name="viewport" content="width=device-width, initial-scale=1.0">
  <title>Error - Something Went Wrong</title>
  <!-- Bootstrap CSS -->
  <link href="https://cdn.jsdelivr.net/npm/bootstrap@5.3.0/dist/css/bootstrap.min.css" rel="stylesheet">
</head>
<body>
  <div class="container vh-100 d-flex flex-column justify-content-center align-items-center">
    <div class="text-center">
      <h1 class="display-4 text-danger">Oops!</h1>
      <p class="lead">Something went wrong, please try again or <a href="mailto:@{outputs('Support_Email')}" class="text-primary">contact us</a>.</p>
    </div>
  </div>
</body>
</html>
Headers
| Key: | Value: |
Content-Type | text/html |
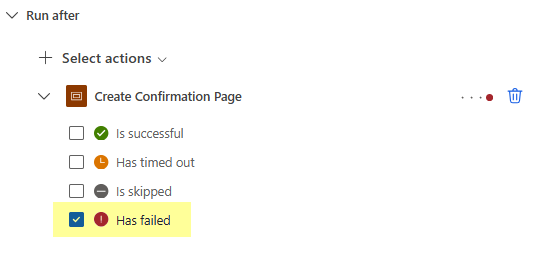
Once added, click on Settings for this action and change “Run After” to ensure it runs only if the Scope action fails.
The page displayed in this scenario will look like this:

Feel free to customize the content and styling to match your needs 😉.
Now, the first flow is almost complete! The only thing missing is the triggering URL for the second flow. We’ll need to come back later and insert it into the relevant Compose action.
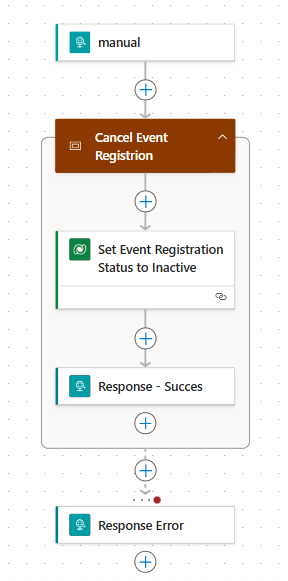
3. Event Registration Cancellation Processing Flow
This flow will trigger when the attendee presses the confirmation button on the Event Cancellation page from the first flow we created.
The flow setup looks like this:
Create a New Flow
Start by creating a new Instant Cloud Flow and selecting the trigger “When an HTTP request is received”.

Set the trigger as follows:
| Who can trigger the flow?: | Anyone |
| HTTP URL: | This is the URL we’ll use in the first flow to trigger this one. It will be generated after saving this flow for the first time. |
| Request Body JSON Schema: | Copy code below and paste here. |
| Method: | POST |
{
    "type": "object",
    "properties": {
        "param1": {
            "type": "string"
        },
        "param2": {
            "type": "string"
        },
        "key": {
            "type": "string"
        }
    }
}
Under Settings, add a Trigger Condition:
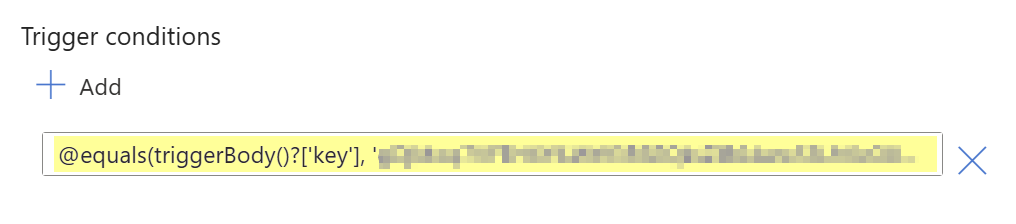
| @equals(triggerBody()?[‘key’], ‘YourSecurityToken’) |
Replace “YourSecurityToken” with the one you created earlier.
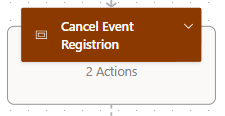
Add a Scope action and name it “Cancel Event Registration”.
Inside the Scope, add a Dataverse “Update a row” action. Name it “Set Event Registration Status to Inactive”. This action will cancel the event registration.
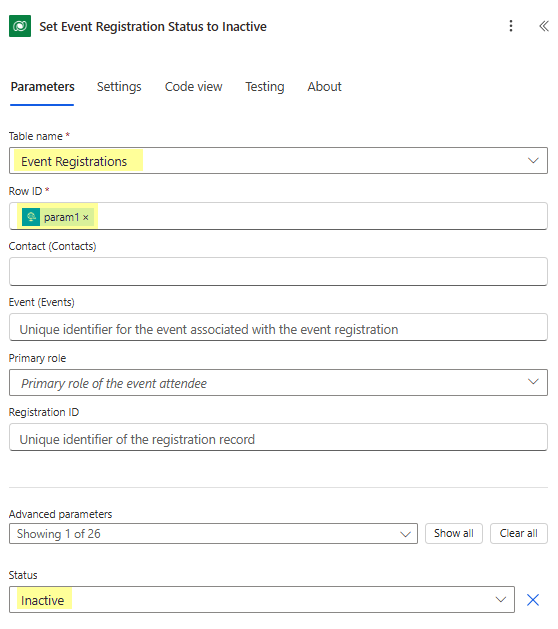
Set it up as follows:
| Table Name: | Event Registration |
| Row ID: | @{triggerBody()?[‘param1’]} |
| Status: | Inactive |
Optional: Customize the Event Registration table by adding a column (e.g., “Cancellation Source”) and setting it to “Self-Cancellation” for better tracking.
Add a Response action and name it “Response – Success”.
Set it as follows:
| Status Code: | 200 |
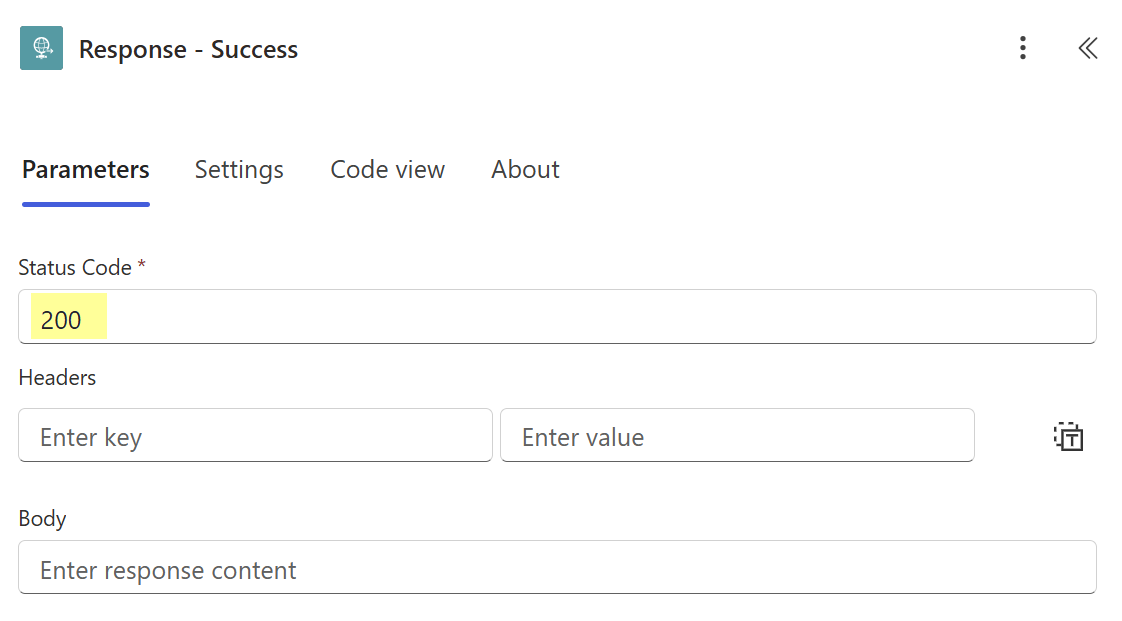
This message will display to confirm successful cancellation. Notice that the button disappears after the cancellation to prevent triggering the flow again.

Add an Error Response
After the Scope action, add another Response action and name it “Response – Error”. This action will notify the attendee if something goes wrong.
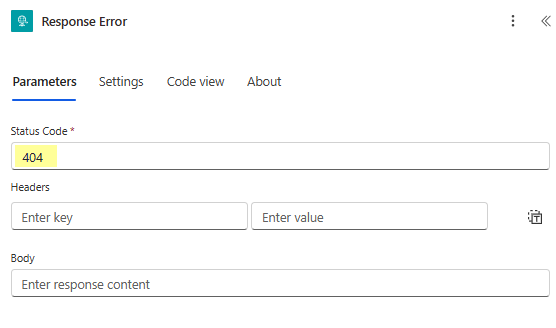
Set it as follows:
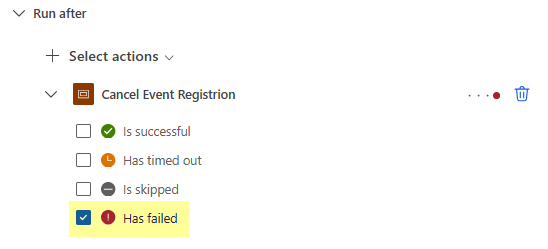
| Status Code: | 404 |
Under Settings, change “Run After” to ensure it only runs if the Scope action fails.
This notification will be displayed for the attandee:

Final Steps
Copy the link from the HTTP trigger and paste it into the Compose action in the first flow.
Now both flows are complete. Hallelujah! 🎉
We’ll stop here for now to avoid turning this post into a novel. To continue, click here to read Part 2. 📖
Leave a Reply